Don’t have time to read it now? Pin it for later!
The list of projects on a homestead is never ending. There’s always something to build, something to fix, or something to weed. Animals need fed, pens need cleaned, eggs need gathered and the house needs to be at least decently tidy.
When there’s more on your to-do list than there are hours in the day, it can feel impossible to keep up, much less to get ahead or find time to tackle big projects.
I get it. My to-do list is huge right now.
It feels overwhelming sometimes, but I have a system that helps me to prioritize my big projects. It also helps me to break them down into manageable pieces that allow me to keep making progress towards my big goals, even when life gets crazy busy.

Make a list of all the projects
The first step to getting rid of homestead overwhelm is to make a huge master list of all the projects that are swirling around in your head. I like to call this a brain dump.
If you’ve read my post on cleaning when you don’t feel like it, you know that I’m a huge fan of doing a brain dump when you’re overwhelmed.
A brain dump is just writing down all the things that you need to do. List out all of the big, overwhelming projects, and don’t forget to include the little stuff that’s bugging you too.
It may seem trivial to write that you want to clean off the porch along side building a barn but put it down anyways. Nothing is too big or too small to go on this list.
Don’t feel surprised if it feels more overwhelming when you look at the huge list in front of you. That’s actually a good thing! It means you did it right!
Once all of the projects are out of your head and written down on paper you can start to prioritize them in the next step.
Sort the list
The next step is to sort and prioritize your giant list of projects. This is where a lot of your overwhelm is going to go away. We’re going to sort your projects into three categories.
The first category is this seasons projects. These are the projects that need to get done in the next three months. I also include any small jobs that will take less than an hour to complete.
Make sure that you have the money and the time to allow you to complete this seasons projects in the next three months. If it’s not affordable or realistic to do in the next three months, then you should move it to the second or third category.
The second category is for the projects you want to get done in the next year.
You might need to save for three or four months to be able to afford these projects, or maybe they just need to be done in the spring and not the fall. Whatever the reason is, these are projects that you can put on the back burner for three to nine months.
The third category is the someday category. These are projects that you’d like to do but don’t have to be done in the near future.
Some of these projects you have to save for quite a while to be able to afford them, or they’re things that would be nice to have but aren’t essential right now. Either way, these projects can be put off for quite a while without causing big issues.
Make sure to be realistic when you are sorting your projects. You can’t put all of your projects on the list to be done in the next three months.
Also, make sure to consider the time of year when you are scheduling your projects. It doesn’t matter how badly the outside of the house needs painted if it’s January and there’s two feet of snow on the ground. Choose projects that are appropriate for the season.

Create Action Steps
Once you’ve completely sorted your master list the next step is to break the next three months projects into manageable action steps. You need to be able to accomplish each step in one day or less.
While you want to be specific with your action steps, don’t get too mired down in picky details.
For example, if your project is to build a new raised bed, action step one would be to purchase all the materials you need, step two would be to build the bed, step three is to fill it with soil and so on.
Be careful not to get too super picky and have step one be to buy fifteen screws, step two buy ten nails and step three buy five 2×4’s. Don’t get so bogged down in writing down every detail that it gets really complicated and fiddly.
Once you’ve identified the action steps for your project you’re going to put them on your calendar or write them in your daily planner.
So, for our raised bed example, on Friday you will do step one, buy the materials. On Saturday you do step two, build the beds. On Sunday you do step three, fill them with soil. The next weekend you buy the plants and plant them.
This works just as well with bigger projects, they just take more days to get them finished.
Every three months you should review your projects. This is when you can add to your master list and plan out the next three months list of projects and action steps.
I usually make my plans seasonally instead of following a strict quarterly calendar. So, just before spring I make a spring project list. Just before summer starts I review the spring list and make a summer list, and so on for fall and winter.

When you are reviewing your project plan it’s important to remember that none of these lists are set in stone.
Let’s say, for example, you decide to get milk goats. You’re super excited and you add a goat milking parlor to your master list of projects. You then sort it onto this year’s project list.
After three months you review your project list and by now you’ve realized that you HATE having to milk every single day. You want to raise meat goats instead.
Just cross the milk parlor off the list!
It’s ok to still be flexible and adjust the list, all it does is provide a framework to break large goals into manageable pieces and helps to prioritize the never-ending list of homestead projects.
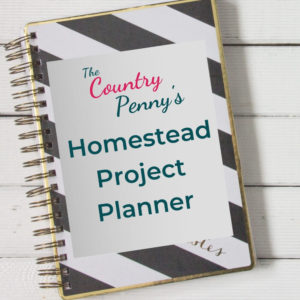
To make this even easier I’ve made you a free Homestead Project Planner that has the whole system all set up. All you have to do is print it out, fill in the details of your project and you’re good to go!
Sign up below and I’ll send it straight to your inbox!
Get Your Free Copy Today!


